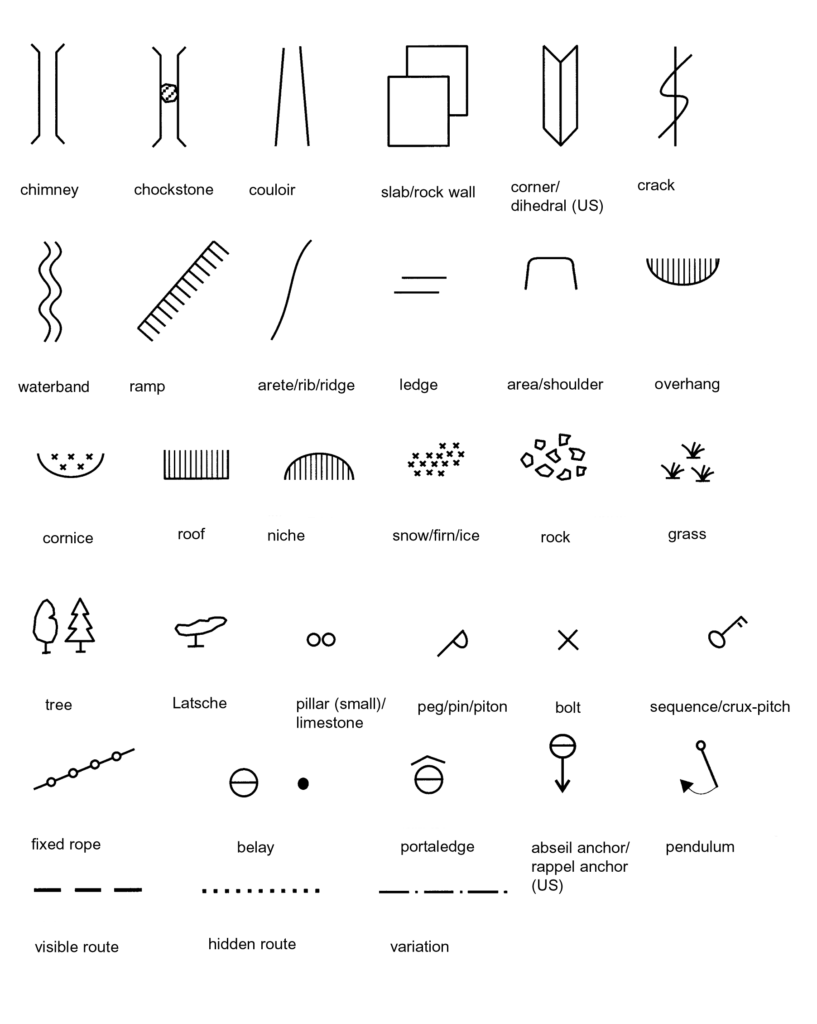
Mountaineering terrain and the routes of mountaineering ascents in particular tend to be described using simple schematics, cartograms and mountaineering topography symbols. In the planning phase these diagrams help us to create our own idea of the terrain through which our ascent route leads. Gradually during the ascent these diagrams can greatly help us navigate the face. Using topography symbols we can above all draw the direction of the ascent route and the format of the terrain through which the ascent leads. Of course no less important are details about the complexity of climbing in the individual sections of the ascent route, the identification of key climbing spots, the distribution and frequency of intermediate protection, belay stations, or bivouacs. A ruler on the side helps us calculate the dimensions of the ascent. It either gives metre height (in German, Hohenmeter), or rope pitches in metres (in German, Seilmeter). The method of measurement selected should be written in the diagrams, or in the case of a guidebook it can be explained in its introductory chapters. If there is a significant traverse in the ascent route a ruler tends to be drawn horizontally directly in the diagram and placed in such a way as to properly express the length of the traverse. It is very practical to have your diagram with you during the ascent on a single sheet of paper prepared in your pocket for immediate reference. Diagrams are often found in mountaineering guidebooks. During the ascent itself mountaineers do not often carry an entire book (guidebook) with them, but only a copy of the ascent in question; it is therefore practical prior to departure on a climb to obtain a copy of the necessary ascents on individual sheets of paper. In older guidebooks but also in many contemporary guidebooks the unified UIAA topography symbols do not tend to be used exclusively. It is always necessary to pay attention to the legend in the guidebook to clarify the correct meaning of the symbols ahead of time.

